Tuesday, October 29, 2019
Thursday, October 3, 2019


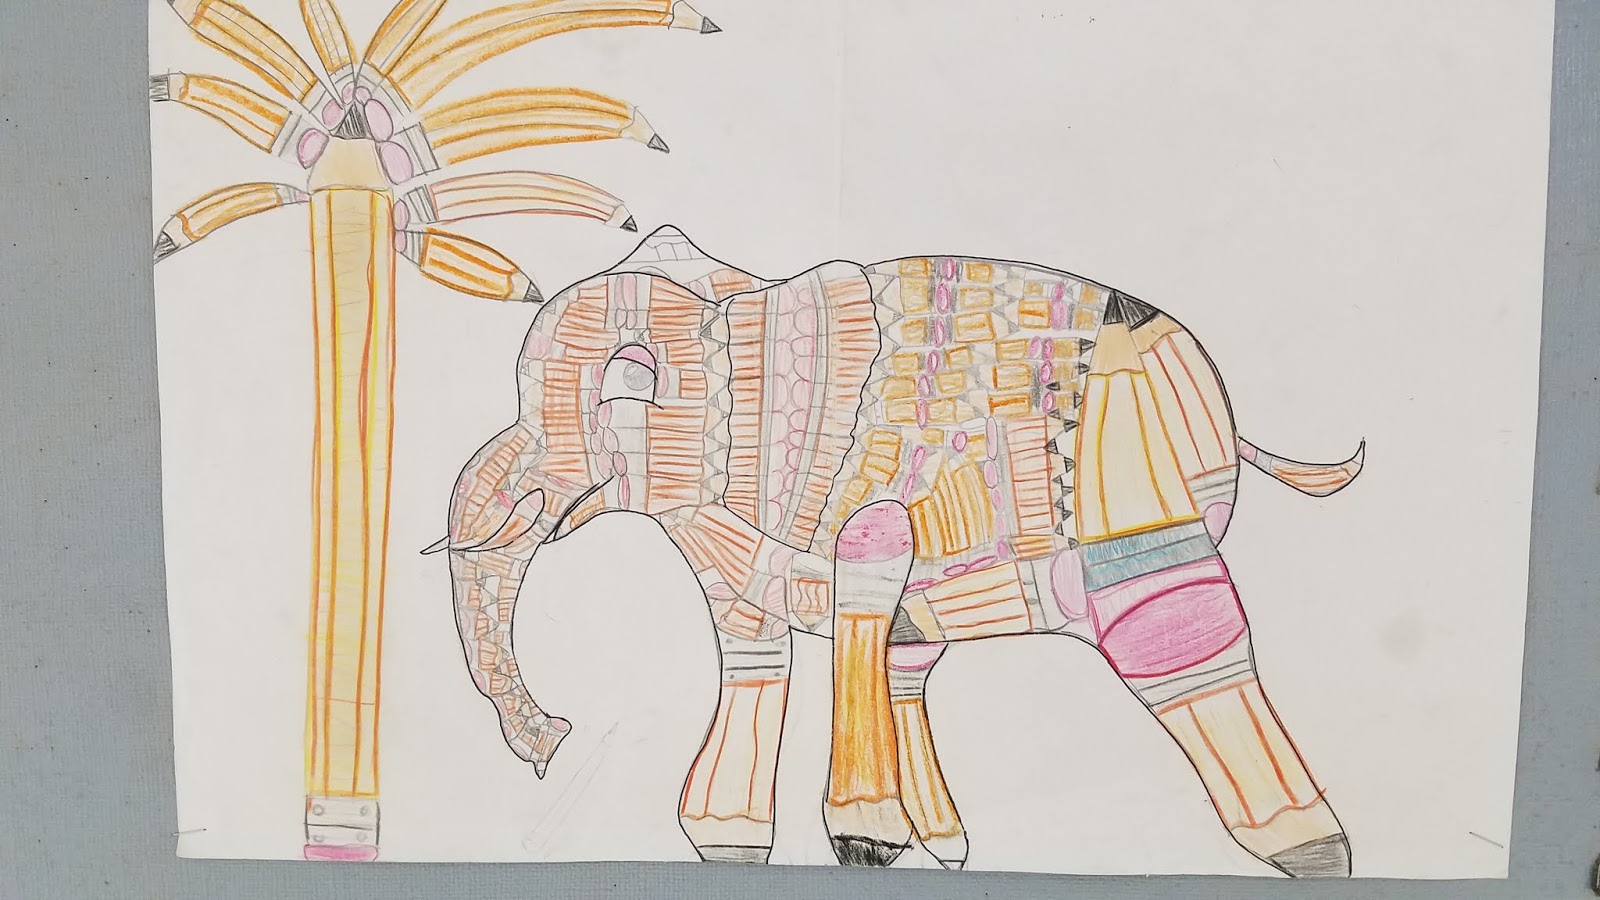
Number 2 Pencil Project
Students are again attempting to blend their own content with the concepts of No. 2 pencils.
Inspiration and Purpose of the Assignment:
Any object that is seen or used on a regular
basis begins to go unnoticed. What we stop seeing is the form,
color, or the object's visual properties. For years you have been
using No. 2 pencils in school on a daily basis. They are indeed an
ordinary, everyday object. What can you develop when you build a 2-D
image using pencil shapes and colors?
Studio Assignment
Transform a simple line drawing into an
unusual new idea: What if this object
was made completely out of pencils?
Steps in class:
1. Introduce the project, start brainstorming:
Give students their drawing paper from the drawing center (18x12) and
write name, date, hour in left corner, and below, work as a class to remember the
characteristics of regular pencils. In
other words, what do they look like? What
materials? What colors are used? What shapes?
( yellow, hexagonal, etc.)
2. On the front they need to create a contour
line drawing of the subject that you have chosen. This means no shading, little or no
texture. Just lines. It needs to be drawn LARGE on the paper or
they will need to restart. There are
drawing books in drawing “studio” that students could use if they need. You could also look things up on the internet,
or students can in the research “studio” if necessary.
3. Fill the contour drawing with drawings of no.
2 pencils (using a no.2 pencil). Stretch, squish, curve, and
transform the pencil shapes to fit your space (You must include at least 30
pencils in your drawing). Look at
the examples from the sub folder for inspiration on how to do this.
4. Add color to your drawing using colored
pencils.


Monday, April 22, 2019
Textured Ceramic Mugs
Its that time of year again when we make mugs to learn how to work with clay. The most important thing students learn is "Scoring and Slipping". I also presented this at the art teacher conference in Knobnoster, Missouri with MAEA (Missouri Art Education Association)
Here are the directions I give out for working with clay, and making a mug:
Slab-Rolling a Mug
Mintert- Knobnoster
2018 mintertf@carthagetigers.org
1. Roll a
Slab- Use fabric, thickness gauges and roller to create a large slab.
2. Check the Thickness- Get low, gently roll the roller over the slab to find any high
spots. Where the roller comes off the
thickness gauges you have thick spots that need to be rolled again.
3. Apply texture-
if you want texture, it needs to be done now.
Get a texture plate, and leaving the thickness gauges in place, apply a
texture by rolling over the texture plate in the clay.
4. Cut the wall-
Using the template (4x11 or 5x11 in) mark the dimensions of the wall. Remove the template and cut free from the
slab.
5. Build the wall-
stand the wall on end and form into a cylinder.
On the ends, use SCORING AND SLIPPING, (AND SQUISHING AND SMOOTHING) TO
JOIN THE ENDS.
6. Roll the base- Take the scraps and re-roll to a slab that
would be large enough to accommodate the cylinder.
7. Measure and connect- Place the cylinder on the slab, mark the location, and flip over the
cylinder onto the fabric, to expose the bottom.
SCORE AND SLIP the slab and base of cylinder. Flip the cylinder over again and firmly press
onto the slipped base.
8. Cut and remove-
Once you are sure it is connected well, use clay tool to cut it free from the
excess slab material and flip it over onto the fabric.
9. Squish and Smooth- while the mug is upside down, double check the bond, and smooth down
any marks. Using a needle tool, ADD YOUR
FIRST AND LAST NAME, CLASS HOUR, AND YEAR to the bottom.
10.
Smooth Inside- Flip the mug
over and use the brush and water to double check the seam on the inside and
remove any extra scoring marks.
11.
Attach the handle- Use the
extruder to pull a handle shape. Attach
using scoring and slipping over the joint in the mug wall.
12. Dry and Fire- Allow the mug to dry for several
days before firing to proper cone in the kiln.
13.
Glazing-Glaze the mug. (
directions on another instruction sheet)
This year many students used a specialty "Crystaltex" glaze that had crystals that burst making a speckled pattern. they turned out really nice!


Wednesday, February 20, 2019
Grid Drawing Project
In addition to learning drawing from observation, I have students learn grid drawing. It works in a similar way, but may be easier since it breaks down an image into smaller, possibly more abstracted tasks.
For ours, I pre-selected some images, and used http://www.griddrawingtool.com/ to automatically apply a 4x6 grid of squares. If students wanted a different image, it was easy enough to pump it into the online program and print out in a minute or so.
our drawing paper is 12- 18 inches, so a 3 inch grid works with a 4x6 matrix.
In fact, I made a classroom set of grids that students could place under their drawing so they did not even have to draw the grid! They could see the grid lightly through the drawing paper.
We had not talked about color yet, so these were finished with pencil and we focused on value.
Grid Drawing Rubric:
Accurate drawing 40 points
Full range of Value 30
Craftsmanship 30
total 100 points
Here are some of our results.


Drawing with Perspective
Perspective drawings re create the way our eyes really work, but does not rely on direct observation. Pre-Renaissance and Renaissance artists like Giotto and DaVinci figured out how this works.
Its been a while since students used perspective in my class. I introduce t-squares for verticals, a triangle for horizontals, and using rulers for orthogonal (lines that go to the Vanishing Point) then all the rules of perspective:
Rules of 1 Point Perspective
1. As things go back in space, they go to a Vanishing Point (V.P.)
2. Front and back edges match/go the same direction.
3. On round objects, the outermost point connects to the V.P.
4. If something gets in between an orthogonal and the V.P. the the line stops (overlapping)
5. As things go back in space they get smaller
Vocabulary:
Vertical-lines that go up and down
Horizontal- lines that go left and right
Orthogonal- lines that lead to the Vanishing Point.
We make 3 projects, 2 class hours each. After this quick start, students finish one to a higher degree, finishing details and adding color.
Rubric:
Correct Perspective 40 points
Color 20
Use of all Space 20
Craftsmanship 20
total 100 points
Here are some of the results:


Subscribe to:
Posts (Atom)